Manage multiple creator shops with the Partner Dashboard
Updated September 18, 2026
How the Partner Dashboard works, how to get access, and how to create client shops for your agency
The Partner Dashboard lets agencies, managers, and service providers manage multiple creator shops from one place. If you're building and operating shops for several creators, this dashboard centralizes access, permissions, and high-level insights.
What the Partner Dashboard lets you do
Once your Partner Dashboard is activated, you can:
- View all creator shops you manage under one login from the Shops tab
- See each shop's level of access and permissions
- Access combined data (e.g., analytics, products, and more) across all creator shops you work with
- Manage creator shops once you've been granted a role (Admin or Super Admin)
- Request or receive permissions similar to joining a creator's team
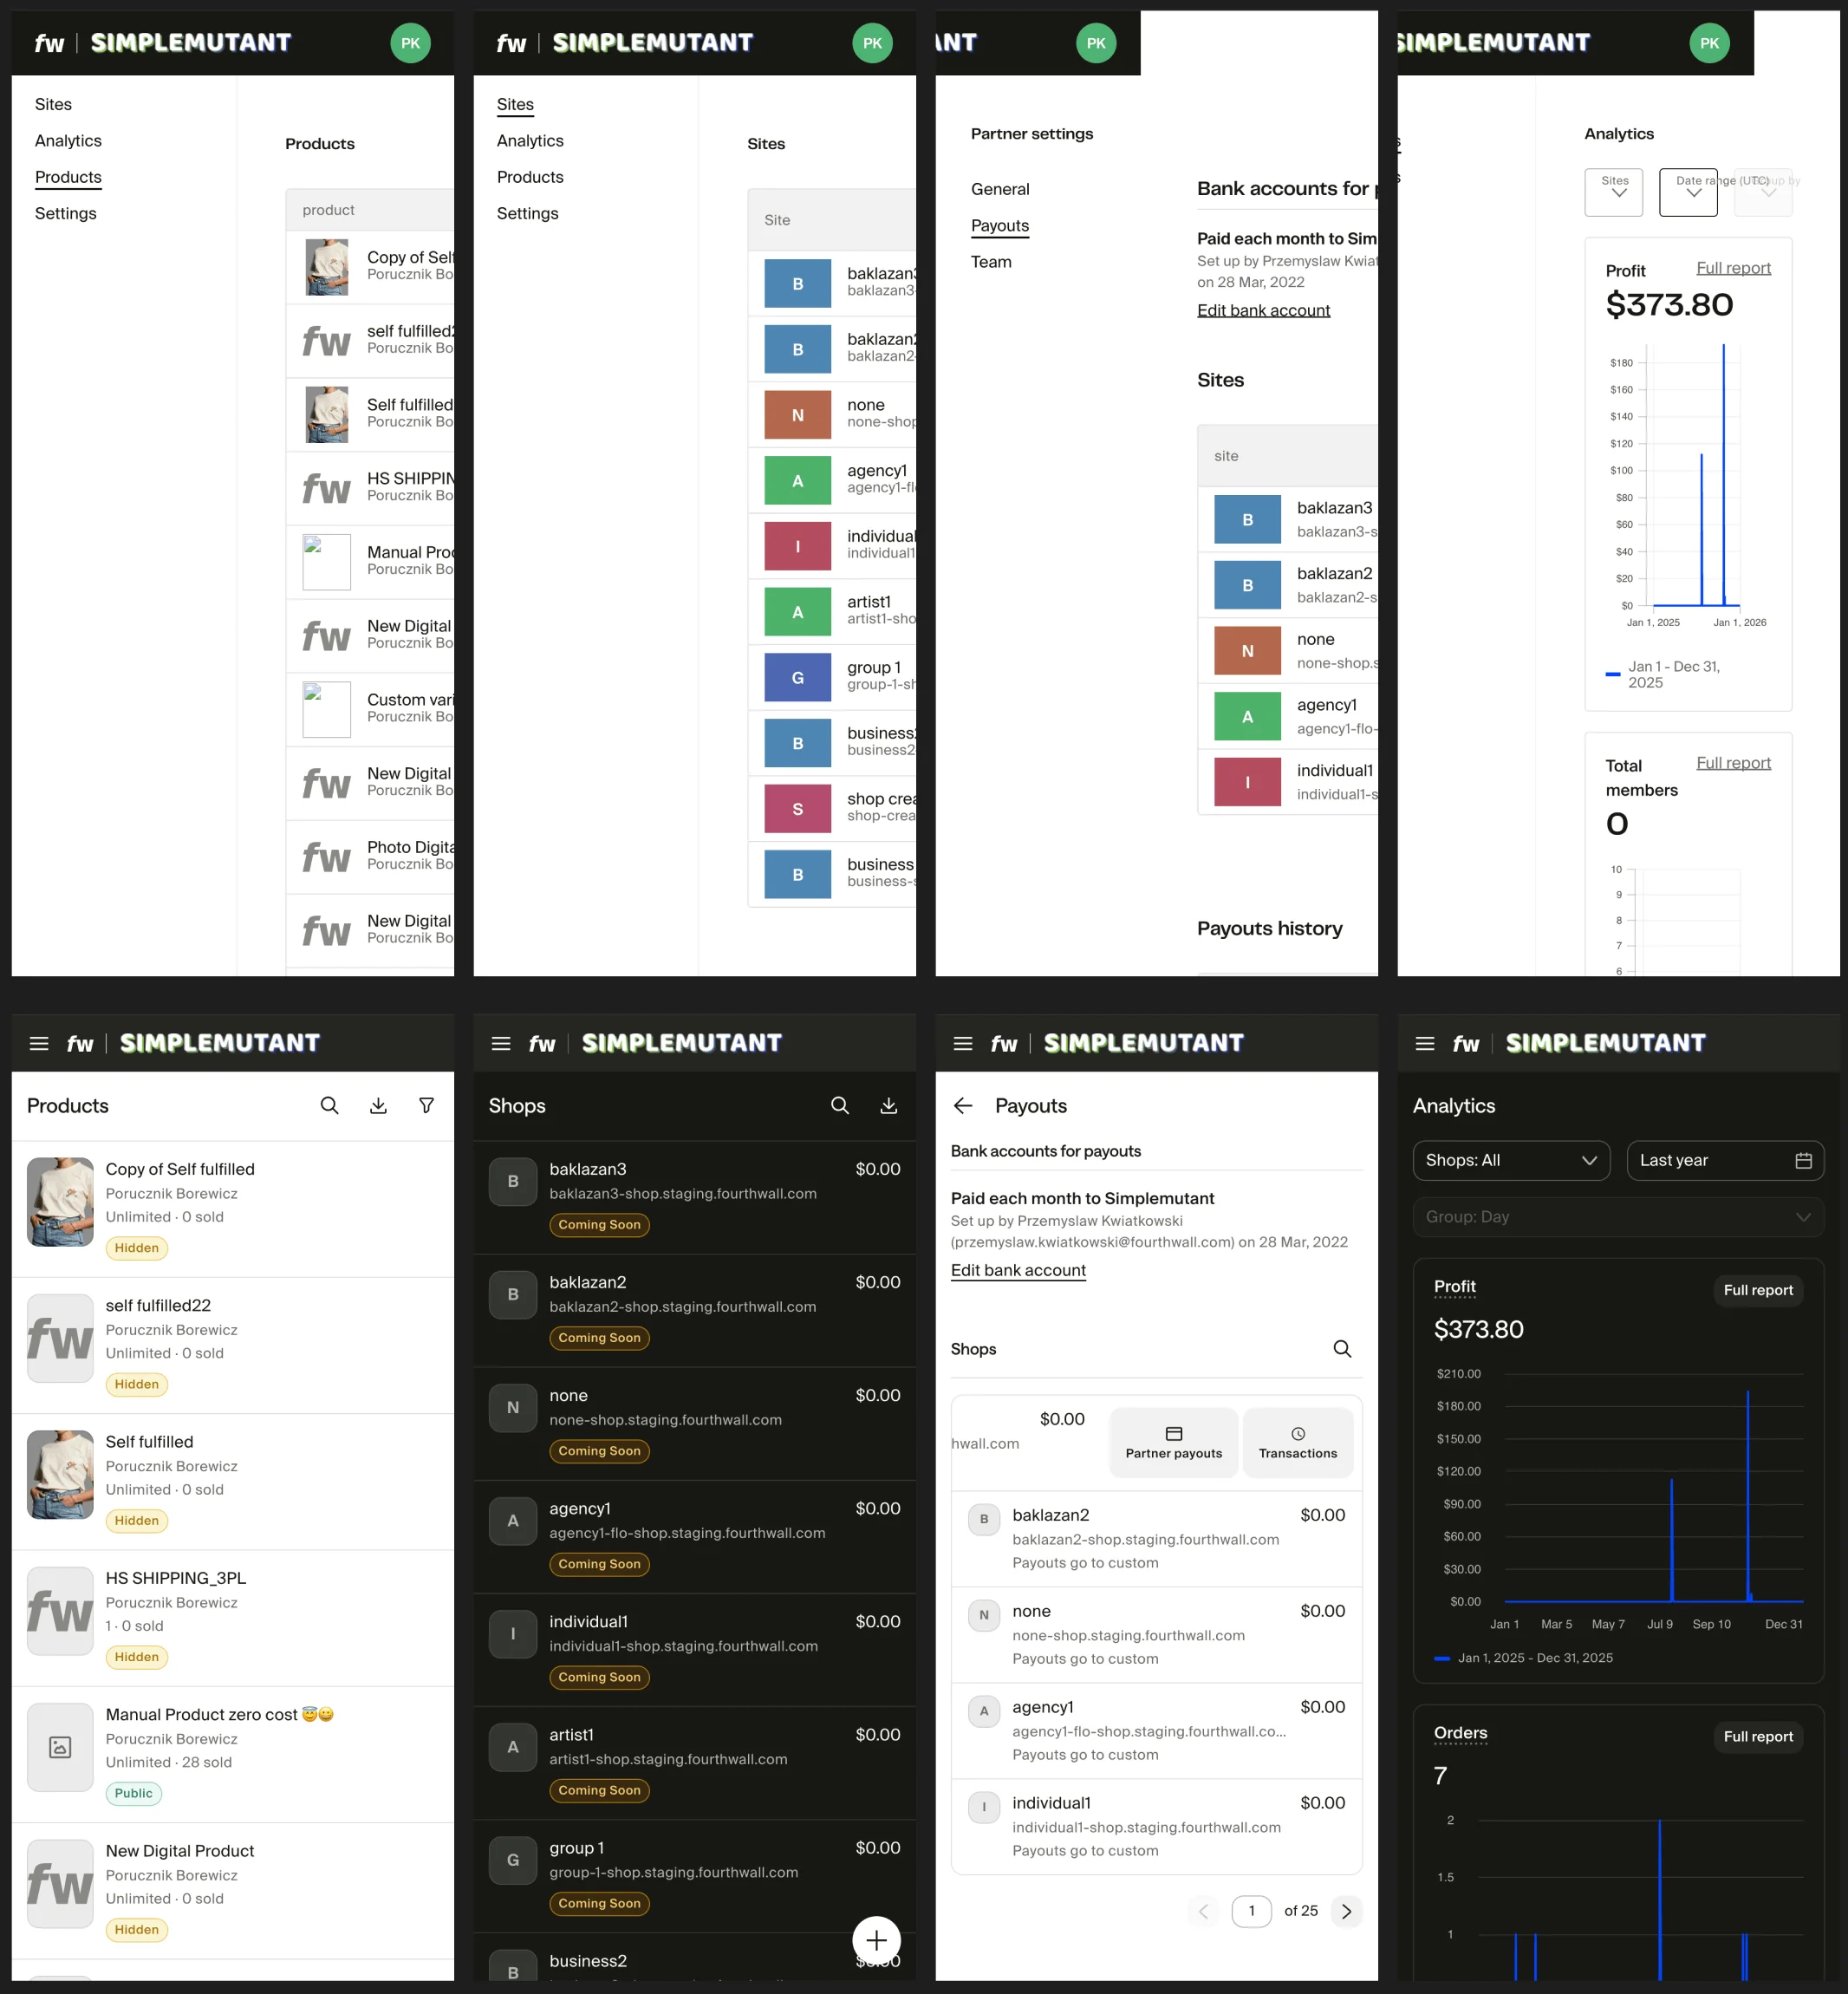
The dashboard works on your phone as well as your desktop, so you can check on shops and payouts wherever you are.
How to get access to the Partner Dashboard
The Partner Dashboard is an enterprise offering that's only available to agencies and large teams. If you qualify, contact Support and provide:
- Your agency or partner name
- The URL of at least one existing Fourthwall shop you manage or would like to manage
- Your Fourthwall contact (if you have one)
- The email address you want to use with the Partner Dashboard
Once activated, you can log in using that email and access your dashboard immediately. You can rename your dashboard and change the email later on if needed.
Creating new shops for clients
The Partner Dashboard does not automatically permit you to create unlimited new shops directly within your partner account.
Step 1: Create a new shop for your client
Each new shop needs its own email at setup. From the Shops tab, click Create shop to start. You can:
- Use another email to build a temporary shop, or
- Create the shop using the client's email if they want to own it from day one
Step 2: Customize the shop
Design the layout, add products, configure memberships, and set everything up like you normally would.
Step 3: Add the shop to your Partner Dashboard
Once the shop exists, you can request access or have Fourthwall Support link it to your Partner Dashboard, so you can manage everything in one place.
Note: If you're creating temporary/demo shops for prospects:
- Invite them as a Super admin, or
- Transfer the ownership entirely to the creator.
Working in the Partner Dashboard interface
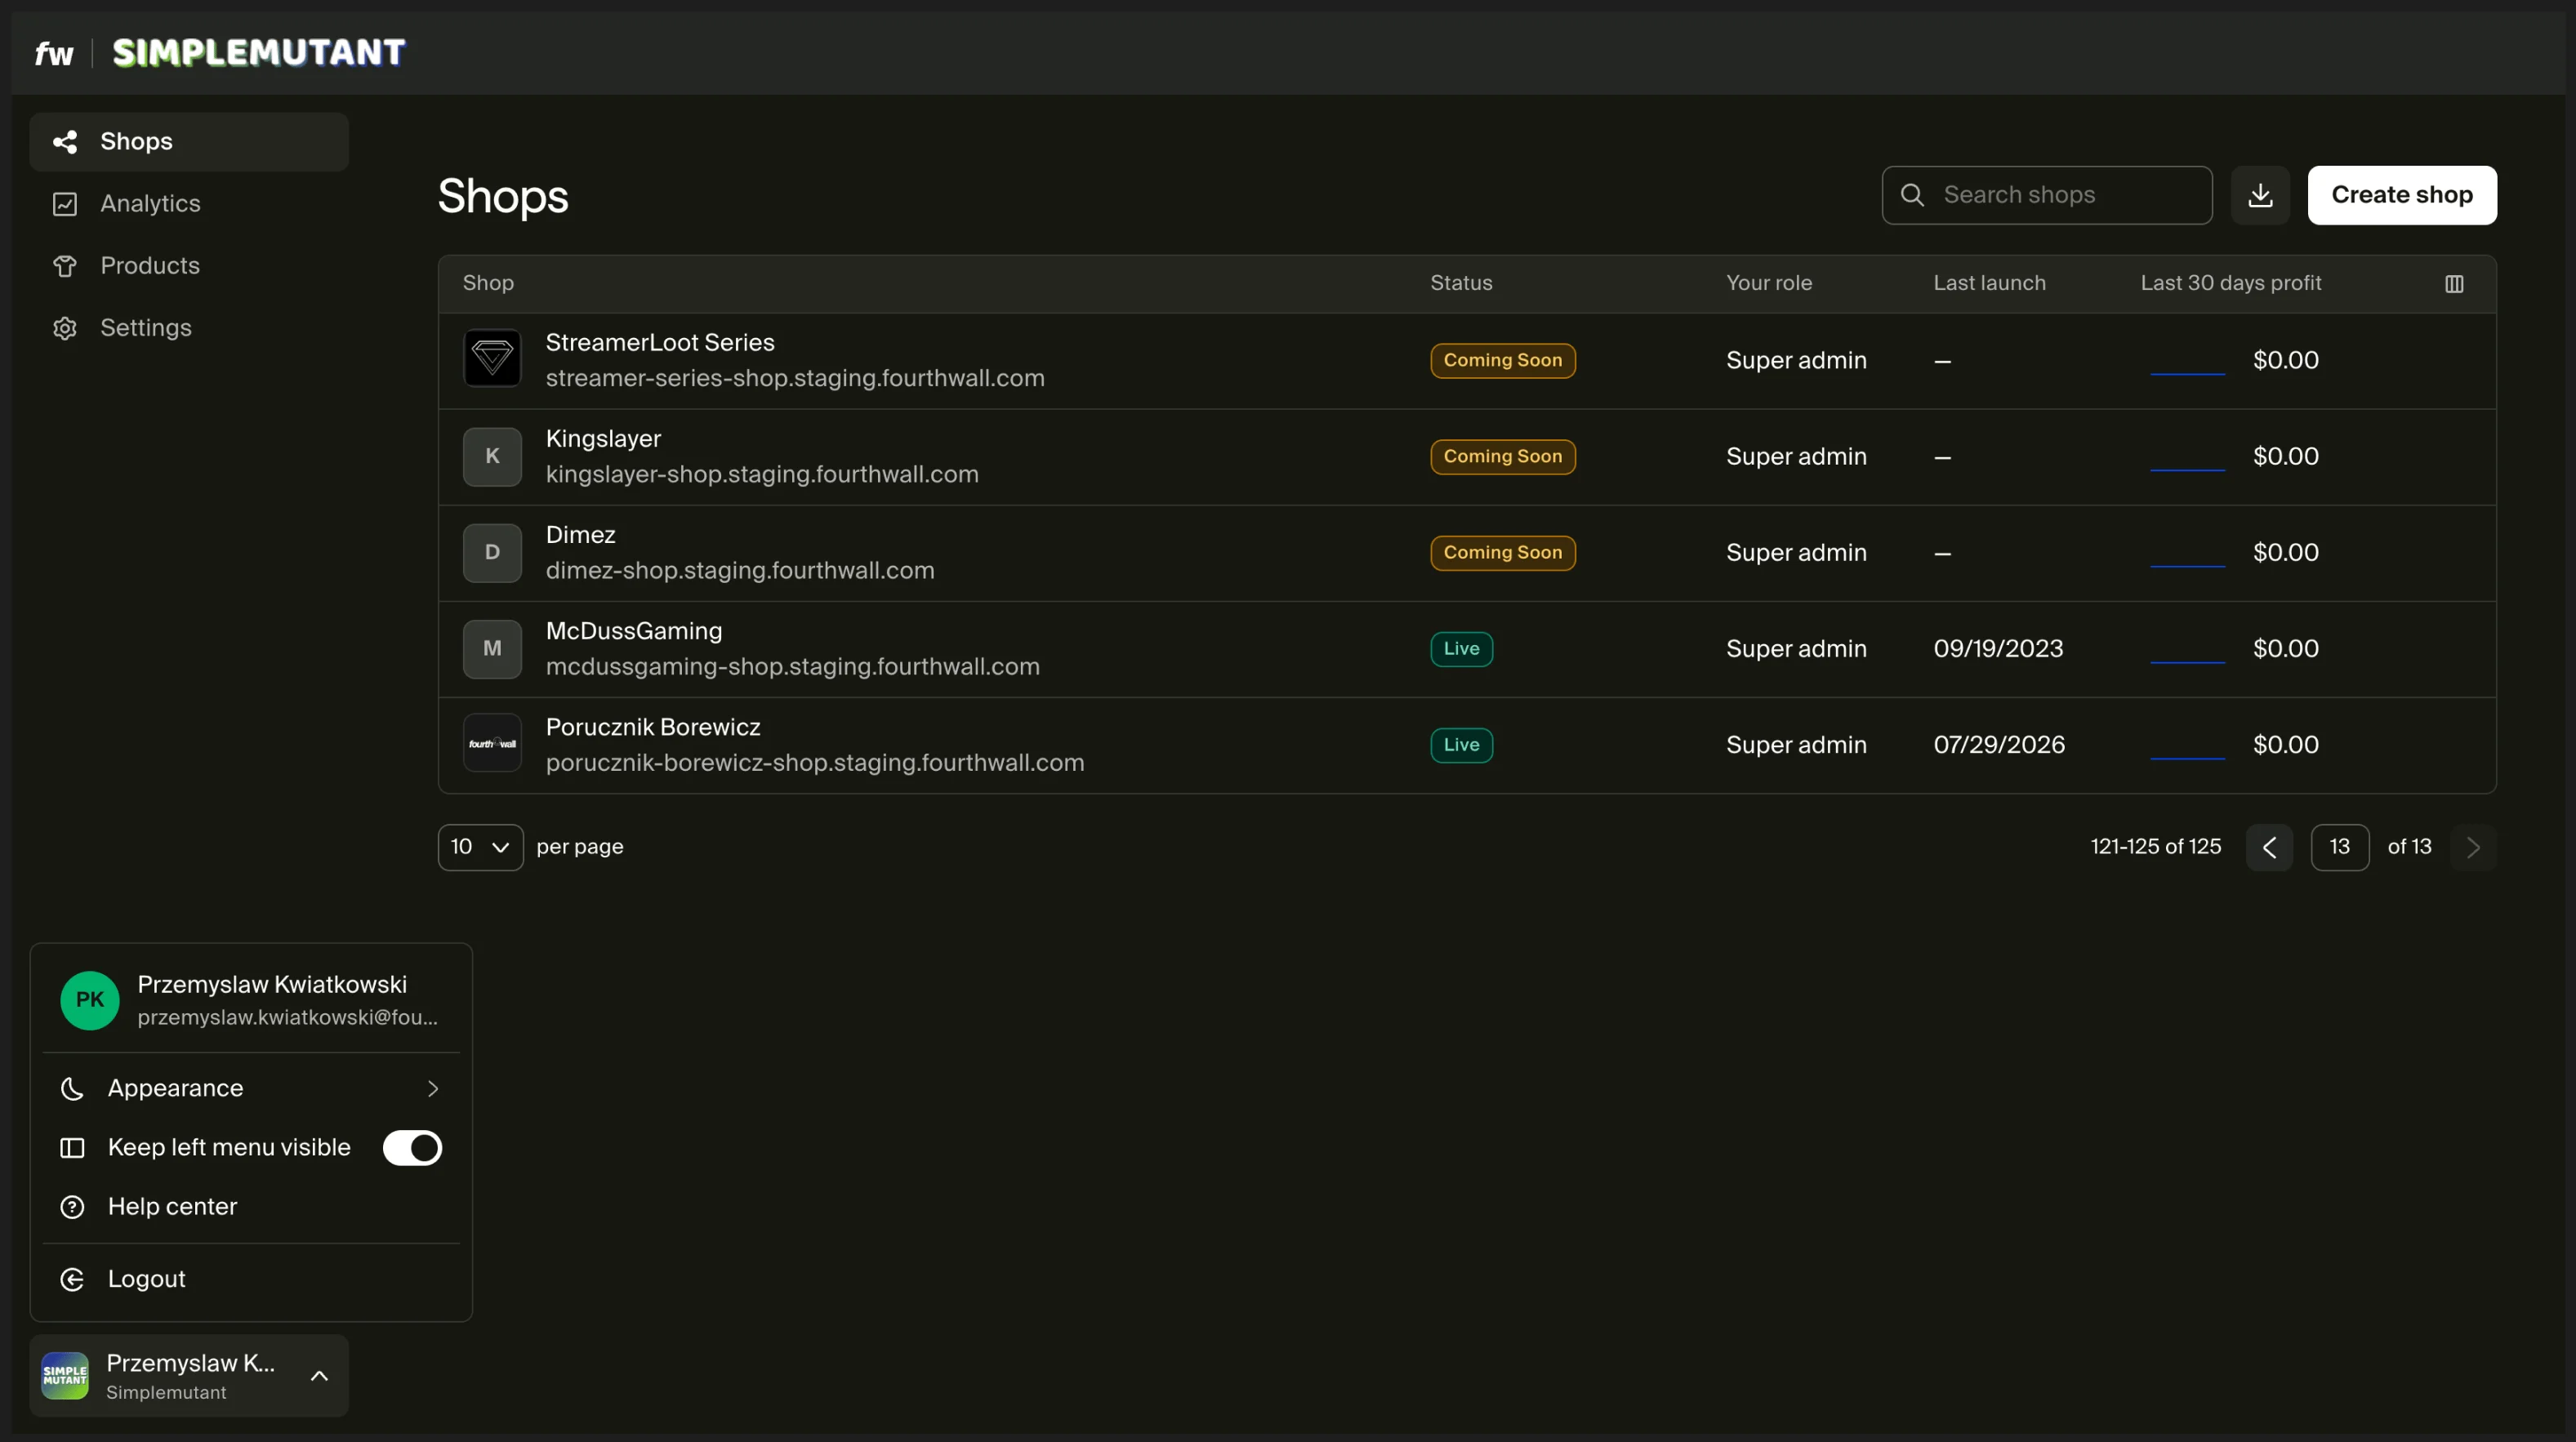
The Partner Dashboard uses the same navigation across every screen: Shops, Analytics, Products, and Settings in the left sidebar. A few interface controls help you tailor the view to how you work.
Collapse the sidebar
Collapse the left sidebar to give your lists more room. Open your profile menu at the bottom of the sidebar and toggle Keep left menu visible off to hide it, or back on to pin it in place. On a phone, the sidebar becomes a drawer you open when you need it, so lists and tables fill the screen.
Switch between light and dark mode
Open your profile menu at the bottom of the sidebar and select Appearance to switch between light and dark mode. Your choice sticks the next time you log in.
Customize list columns
The Shops and Products lists let you choose which columns to show and in what order. Click the columns icon on the right side of the list header, then:
- Show or hide columns. Check or uncheck each column, such as Created on, Status, In stock, or Number sold.
- Reorder columns. Drag and drop columns into the order you want.
- Reset view. Click Reset view to return to the default columns and order.

Both lists include a search box and an export option so you can pull the data you need without opening each shop.

Manage shops from your phone
The Partner Dashboard is mobile-responsive, so every screen adapts to smaller displays. Lists, analytics, and payouts all reflow to fit a phone, and the sidebar tucks into a drawer you open when you need it.
Commission structure
As a partner, you earn a commission on sales generated by the shops you manage. Commission rates vary depending on your partnership agreement with Fourthwall. Contact your Fourthwall representative or the support team to confirm the rates that apply to your account.
Key details about partner commissions:
- Commission basis. Commissions are calculated on net sales (after refunds and chargebacks) from shops linked to your Partner Dashboard.
- Rate agreements. Your commission rate is set during onboarding and may differ based on the number of shops you manage or total sales volume.
- Visibility. You can view commission earnings in your Partner Dashboard alongside shop-level performance data.
Commission rates and terms are specific to each partner agreement. If you have questions about your rate or need to renegotiate, reach out to your Fourthwall contact.
Payout flow
Fourthwall processes partner commission payouts through Stripe Connect. Here's how the payout cycle works:
- Sales are tracked. Each order placed on a shop linked to your Partner Dashboard is automatically attributed to your account.
- Commissions accrue. Your earned commissions accumulate based on finalized (non-refunded) orders.
- Payouts are issued. Fourthwall sends your commission payout to your connected Stripe account on a regular schedule.
Payout timing follows the same schedule as creator payouts. You can check your payout status in the Billing and payouts section of each managed shop's dashboard.
If a refund or chargeback occurs after a commission has been calculated, the affected commission amount is deducted from your next payout.
Set up Stripe Connect payouts
Stripe Connect is the infrastructure Fourthwall uses to process payments and issue payouts. You can set up one Stripe Connect account at the Partner Dashboard level and use it across the shops you manage, or give individual shops their own account. The choice is yours.
Set up your partner payout account
Add a payout account once at the Partner Dashboard level, and any new shop can pay out to it.
Step 1: Log in to the Partner Dashboard and go to Settings > Payouts.
Step 2: In the Bank accounts for payouts section, set up your Stripe Connect account.
Step 3: Follow the Stripe Connect onboarding flow. You'll need:
- A valid email address for the Stripe account
- Business or individual tax information
- A bank account for receiving payouts
Step 4: Complete the verification steps Stripe requires (identity verification, business details).
Choose how each shop pays out
When you create a new shop, it defaults to paying out to your partner bank account. You can configure each shop individually to use either your partner payout account or its own Stripe Connect account.
- Partner. The shop pays out to the partner bank account you set up in Settings > Payouts. This is the default for new shops.
- Custom. The shop uses its own Stripe Connect account. Choose Set custom payout settings on the shop to connect a separate account for that creator.
Use Custom when a creator owns their shop and wants payouts to land in their own bank account. Use Partner when your agency collects payouts on the creator's behalf.
Multi-shop best practices
Managing multiple creator shops requires clear organization. These practices help agencies run smoothly at scale.
- Use consistent naming. Name each shop in your Partner Dashboard so you can identify clients at a glance. Include the creator's name or brand in the shop label.
- Set up Stripe Connect early. Add your partner payout account in Settings > Payouts before you launch shops, so new shops can pay out right away. You can use this shared account across shops or give each shop its own account by choosing Set custom payout settings. Either way, configure payouts during initial setup to avoid delays in processing orders.
- Assign team roles carefully. Use Admin access for day-to-day managers and reserve Super Admin for account owners. Go to Settings > Team to manage roles on each shop.
- Keep ownership clear. Decide upfront whether the creator or the agency owns each shop. If the creator will eventually take over, set them up as the account owner from the start.
- Monitor performance centrally. Use the Partner Dashboard's combined analytics view to track sales, traffic, and product performance across all shops without switching between accounts.
- Standardize shop setup. Create a checklist for new shop launches covering domain, Stripe Connect, shipping settings, product uploads, and design. Consistency reduces setup errors.
- Customize your list columns. Show the columns that matter for each list and hide the rest, so the Shops and Products views surface what you check most.
If you have questions, don't hesitate to reach out to our support team.