Klaviyo
Updated August 12, 2026
Sync emails, automate marketing flows, and customize sign-up forms by connecting Klaviyo to your Fourthwall site
What is Klaviyo?
Klaviyo is a marketing email automation tool that syncs all customers' emails from your Fourthwall site and other email-capturing options. It also allows you to message past buyers, send custom cart abandonment emails, and use other email marketing capabilities.
If you don't have a Klaviyo account, you can sign up here.
How can you use Klaviyo with Fourthwall
- Connect your Fourthwall account to Klaviyo to enable the following:
- Any time a customer places an order, their email address will be automatically sent to Klaviyo (as long as they opt in during checkout)
- Any time a customer opts into your mailing list, their email address will be automatically sent to Klaviyo
- Set up Sign-up forms and Cart abandonment for your site
- Once connected, you can use Klaviyo to send:
- Custom cart abandonment emails
- Promotional email campaigns
- And track the success rates of each email campaign
Integrating Klaviyo with your Fourthwall site
To add the Klaviyo integration with your Fourthwall site:
Step 1: Go to Apps within your Fourthwall dashboard and filter by "Email marketing" options. Click the Klaviyo app to continue.

Step 2: In the next screen, you want to click on Connect to the right of the Klaviyo app option.

Important: If you plan to use Klaviyo for abandoned cart emails, make sure to disable Fourthwall's default abandoned cart emails first.
Clicking Connect takes you to the Klaviyo OAuth authorization screen. No API key is needed. Fourthwall connects to Klaviyo through OAuth, so you only need to approve the permissions on Klaviyo's side.
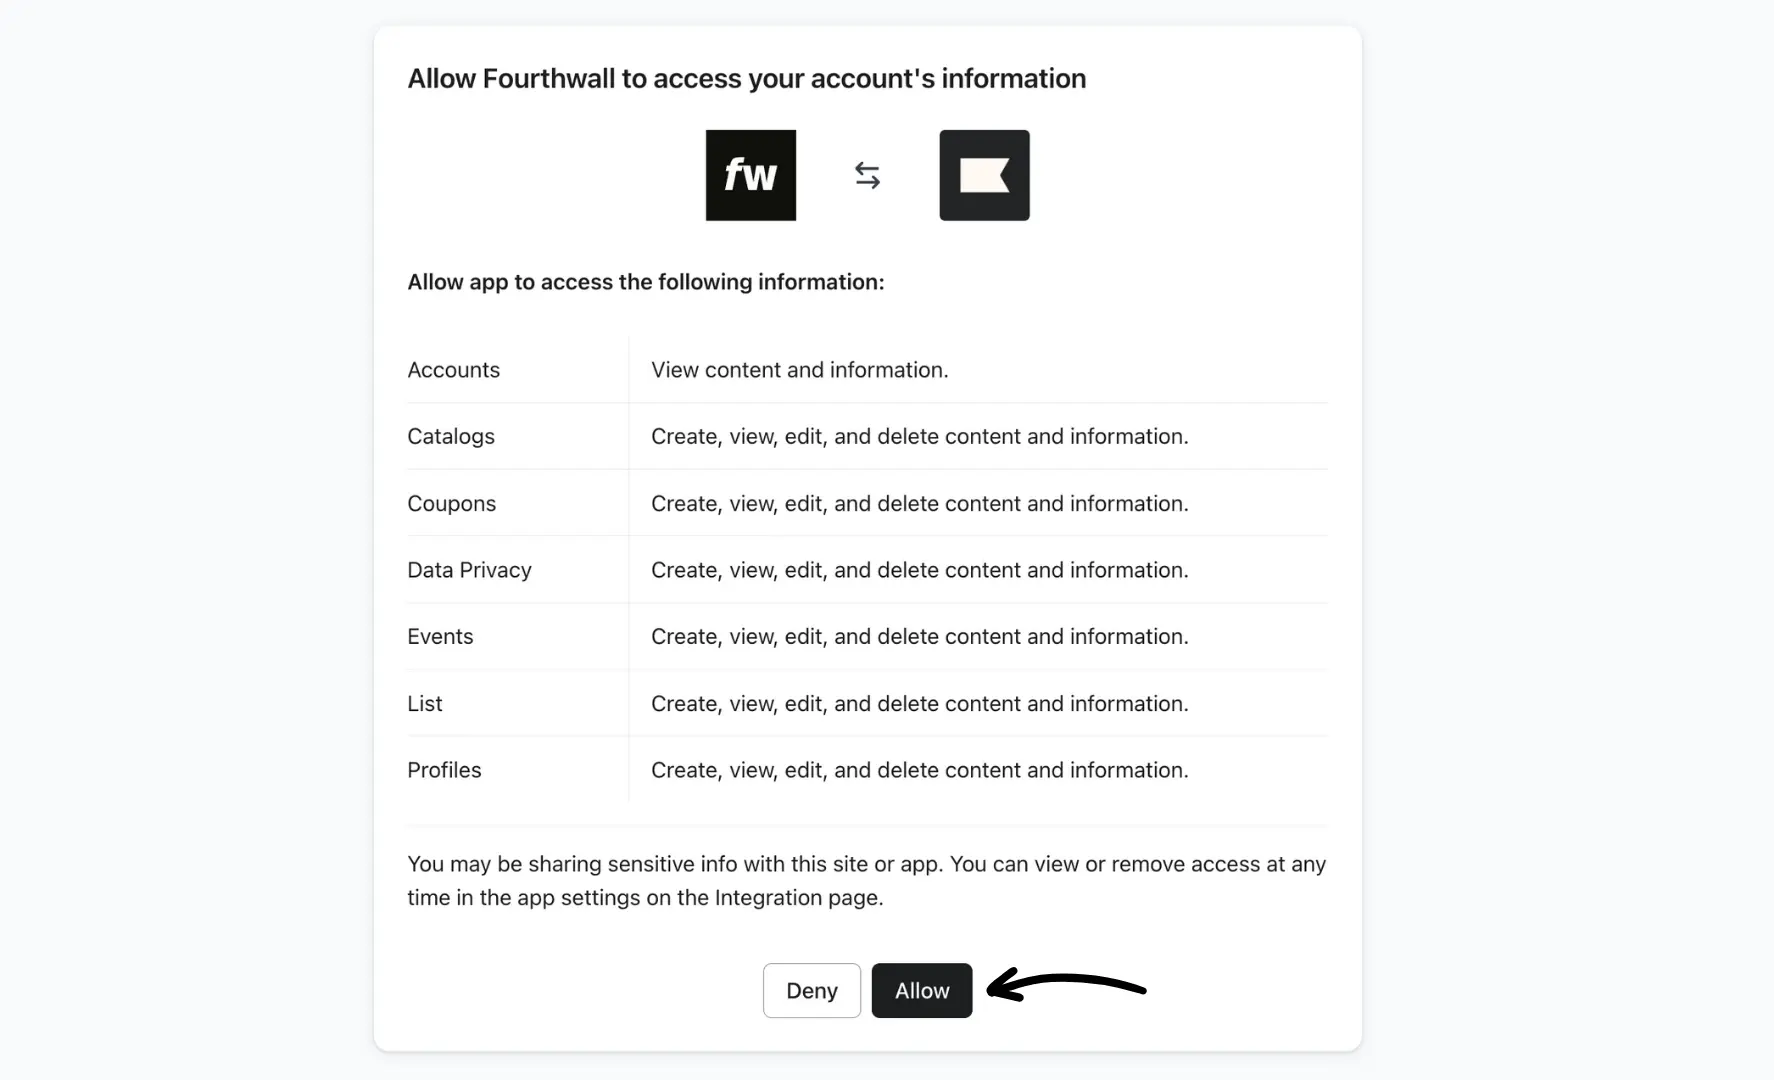
Click the Allow button to verify permissions on Klaviyo.
If you have multiple Klaviyo accounts, make sure the correct one is being connected. If not, you click on Switch account and select the correct one to connect.
After you allow these permissions, your Klaviyo account is linked to your Fourthwall shop and starts receiving transactional data automatically.
Step 3: Back on the Klaviyo app page in your Fourthwall dashboard, you'll see a Connect with Klaviyo panel. Click Get Started to pull your Klaviyo lists into Fourthwall.
Once your lists load, the Configure your Lists screen opens so you can choose where customer data goes.
Configure your Lists
This screen appears once, during your first setup, right after you click Get Started. Assign two Klaviyo lists that decide where Fourthwall sends customer data:
- Members List receives your customers' information. Any time a customer places an order and opts in, their email is added to this list.
- Newsletter List receives contacts who opt in to marketing emails. When a customer checks the marketing opt-in box during checkout, their email is added to this list.
Both dropdowns pull directly from the lists in your Klaviyo account. If you added lists in Klaviyo and don't see them, click the refresh button next to the Members List dropdown to reload your options.
Pick + Create New List in either dropdown to have Fourthwall create the list for you. New lists are named "Members List" and "Newsletter List" automatically, and those names can't be set from Fourthwall.
Important:
- Check both selections before saving. This is a one-time setup step. Once both lists are saved, the screen is replaced permanently by your connection status, and list assignments can't be changed or viewed again from the Fourthwall dashboard.
- Disconnecting the app won't reset your lists. If you disconnect Klaviyo and connect it again, your saved list assignments stay in place, so the Configure your Lists screen won't come back.
- Use two different lists. The same Klaviyo list can't serve as both your Members List and your Newsletter List. Saving the same list for both returns an error and nothing is stored.
Click Save Configuration to finish.
Sync your existing data to Klaviyo
Once your lists are saved, the Klaviyo app page shows a Successfully Connected to Klaviyo panel. This is the screen you'll see on every visit from then on.
Important: Sync Now runs once. The button is disabled after your data has been synced, so you can't repeat it.
Click Sync Now to push the data you collected before connecting: existing members, newsletter and mailing list subscribers, products, promotions, and collections. Everything after that flows to Klaviyo automatically.
Above the button, Fourthwall shows an estimated monthly Klaviyo cost for the data being synced. Treat it as an estimate only. It's based on Klaviyo's published email pricing, and your actual bill may differ. If your data set is larger than 500 records, Fourthwall asks you to confirm the sync first, since adding more profiles raises your Klaviyo charges.
Shops with more than 5,000 combined member and newsletter records can't run the sync themselves. Email us at support@fourthwall.com and we'll take care of it for you.
If your shop is blocked from syncing, you can still export your existing emails from your Fourthwall dashboard and bulk import them into Klaviyo by hand.
Connecting your domain in Klaviyo
By default, Fourthwall uses the "support." subdomain. Klaviyo, by contrast, uses the "send." subdomain. If you use a custom domain, it is important that you configure this send. subdomain in your Klaviyo settings. To get started, within your Klaviyo dashboard, go to Settings > Domains and click Add Domain to follow the steps on how to configure your domain.

When setting up the domain, we recommend using Static options within Routing in the first step of the process.

You can find detailed instructions on how to set this up here.
How do I create custom cart abandonment emails?
By default, Fourthwall automatically sends cart abandonment emails to your customers who started the checkout but left after entering their emails. You can read more about those emails in this help article. However, if you prefer to customize the flow or the look and feel of the cart abandonments, you can do so with Klaviyo.
This Klaviyo help article will walk you through creating a custom cart abandonment email with Klaviyo.
When creating a cart abandonment flow, make sure to select your "Profile filter" to be Person has:
- "Placed order"
- "zero times"
- "since starting this flow"
as the three setting options.

Capture emails via Sign-up forms
You can use Klaviyo to create various types of sign-up forms to capture customers' email and/or phone numbers to use in your marketing campaigns:
- Popup form - Appears in the middle of the browser window. Popups are eye-catching and high-converting but potentially disruptive to a visitor's experience.
- Flyout forms - Appear to "fly out" from the edge of the page. Flyouts are still noticeable, but they generally allow a visitor to keep browsing without having to interact with the form.
- Embed form - Embedded on a specific page or section of your site, like the footer of your homepage. Embeds are helpful and easy to find for visitors who come to your site intending to subscribe. Consider including an embedded form in your footer in addition to any pop-up or flyout forms you build.
- Full-page form - Display over the entire browser window, capturing your shoppers' full attention. These are high-converting forms because they cannot be easily overlooked; however, this also makes them more intrusive since shoppers must interact with the form to close it. Consider using a full-page form as a landing page if you want a designated opt-in page on your site.
Set up sign-up forms
- Go to your Klaviyo dashboard and click on Sign-up forms.
- Scroll down to browse the various template options. Find the one you like the most and click on it to create the form.
- Customize the style, targeting & behavior, add steps as needed, etc.
- Once completed, click Publish, and your sign-up form will show up on your Fourthwall site.
To read more about sign-up forms (how-tos, customization, rules, etc.), check out Klaviyo's help center.