Add, remove, and reorder page sections
Updated May 11, 2026
Control what appears on each page of your site and in what order
Your site pages are made up of sections. Each section is a content block you can add, move, hide, or remove at any time. You choose which sections appear on each page, where they sit, and whether visitors can see them.
Step 1: Open the Layout tab
In your Fourthwall dashboard, go to Site design > Layout.
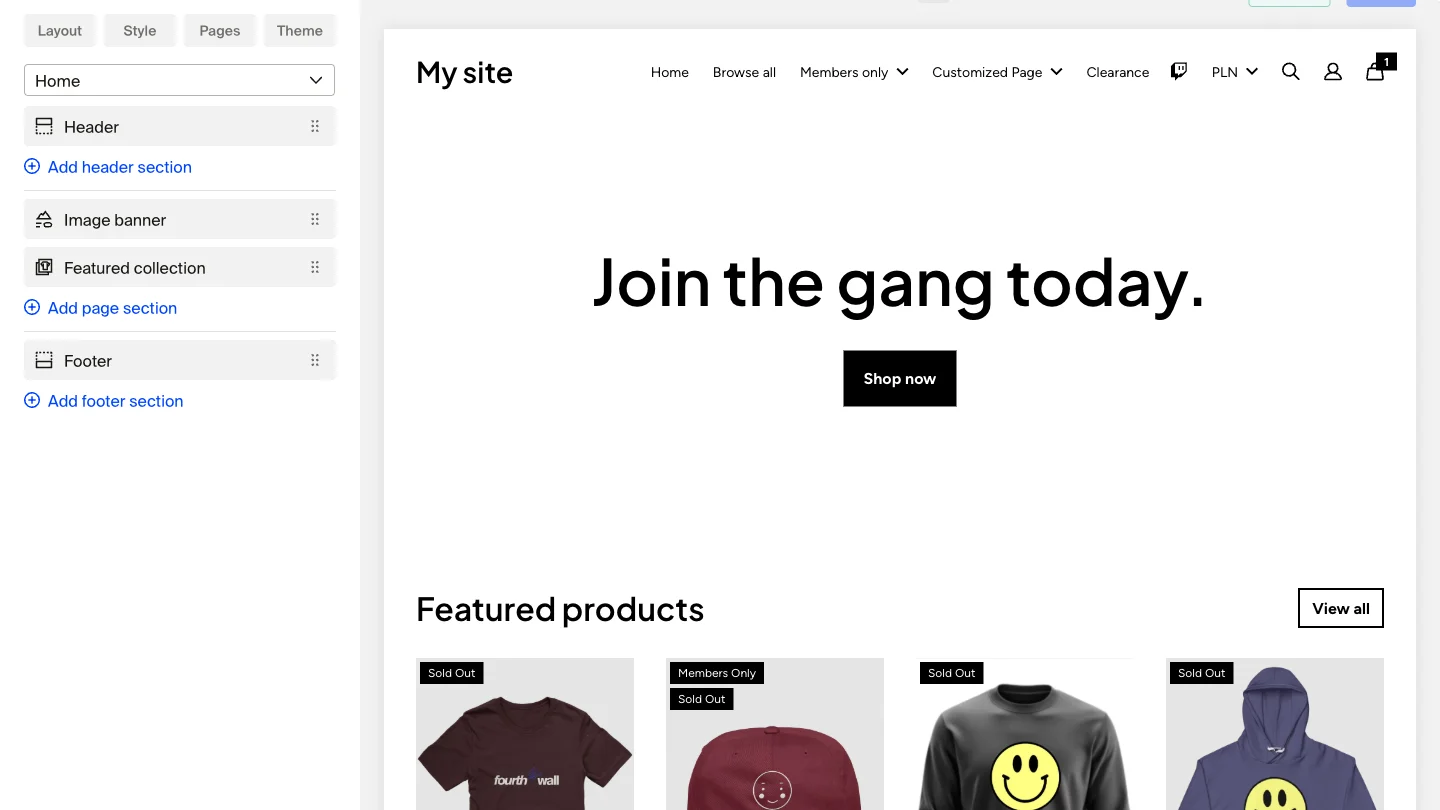
Use the dropdown at the top to select the page you want to edit. The Home page is selected by default. You can switch to any other page, including custom pages, collections, memberships, and checkout.
Step 2: Add a section
Click (+) Add page section in the left panel to open the section picker.
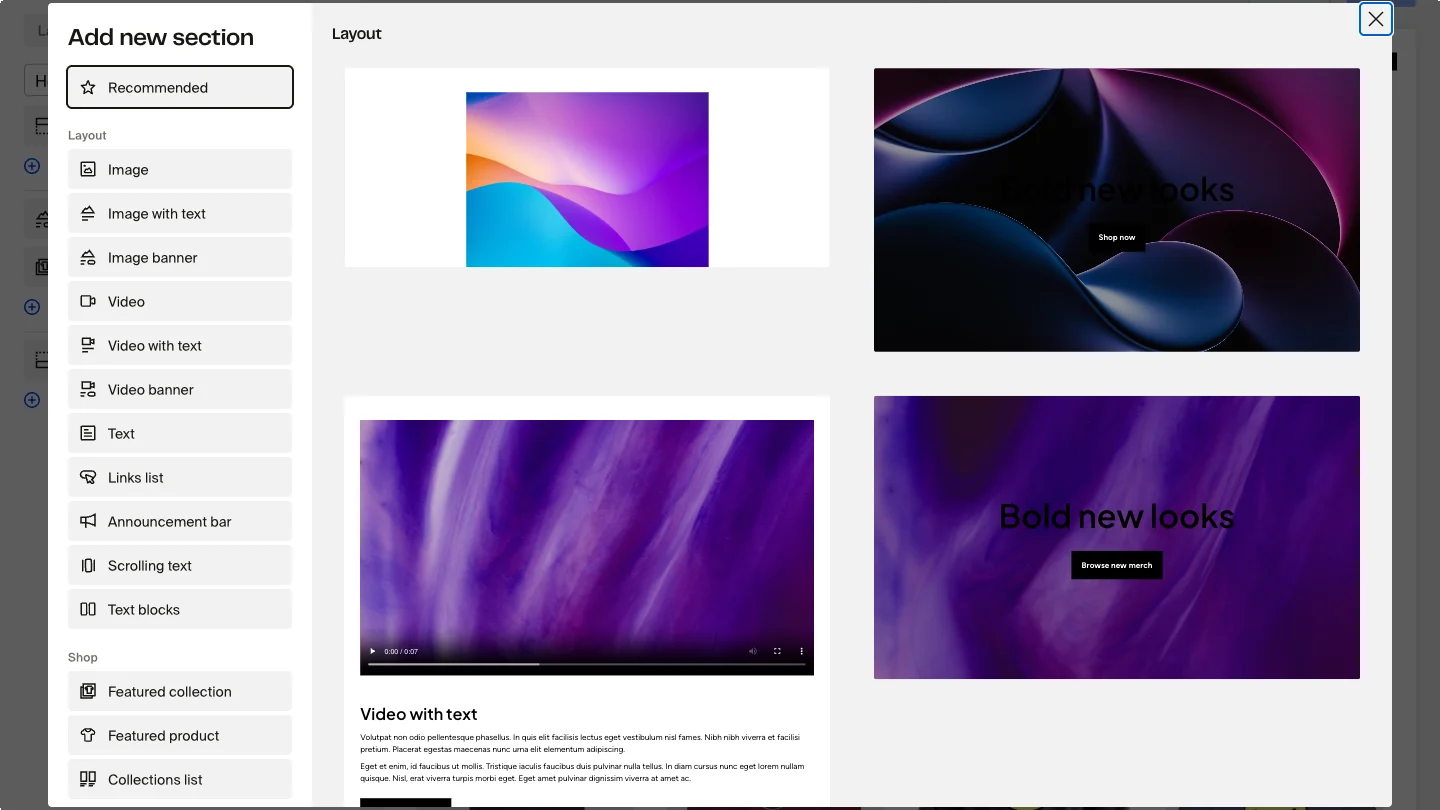
Sections are organized into categories:
Layout
- Hero/banner — full-width image with optional text and buttons
- Image — a single image or image gallery
- Text — headlines and body copy
- Text carousel — scrolling text in a rotating banner
- Links — a list of links with icons and text
- Spacer — adds vertical space between sections
Media
- Video — upload or embed a video
- YouTube — display your latest YouTube videos
- Instagram feed — show your latest Instagram posts
- TikTok feed — show your latest TikTok videos
Shop
- Shop — displays all your products
- Featured collection — highlights a specific collection
- Featured product — spotlights a single product
Memberships
- Membership tiers — promotes your membership options
- Recent posts — shows your latest membership posts
Engagement
- Newsletter — adds an email signup form
- Donations — lets supporters send donations
- Embed — embeds an external page as an iframe
- Custom HTML — adds your own HTML and code
Navigation
- Search bar — lets visitors search your site
- Announcement bar — adds a text bar with optional countdown
Click Add next to the section type you want. The section appears at the bottom of the page and its settings open automatically.
Step 3: Reorder sections
Grab the drag handle (the six-dot icon) to the left of any section and drag it to a new position in the list.

The live preview on the right updates as you drag.
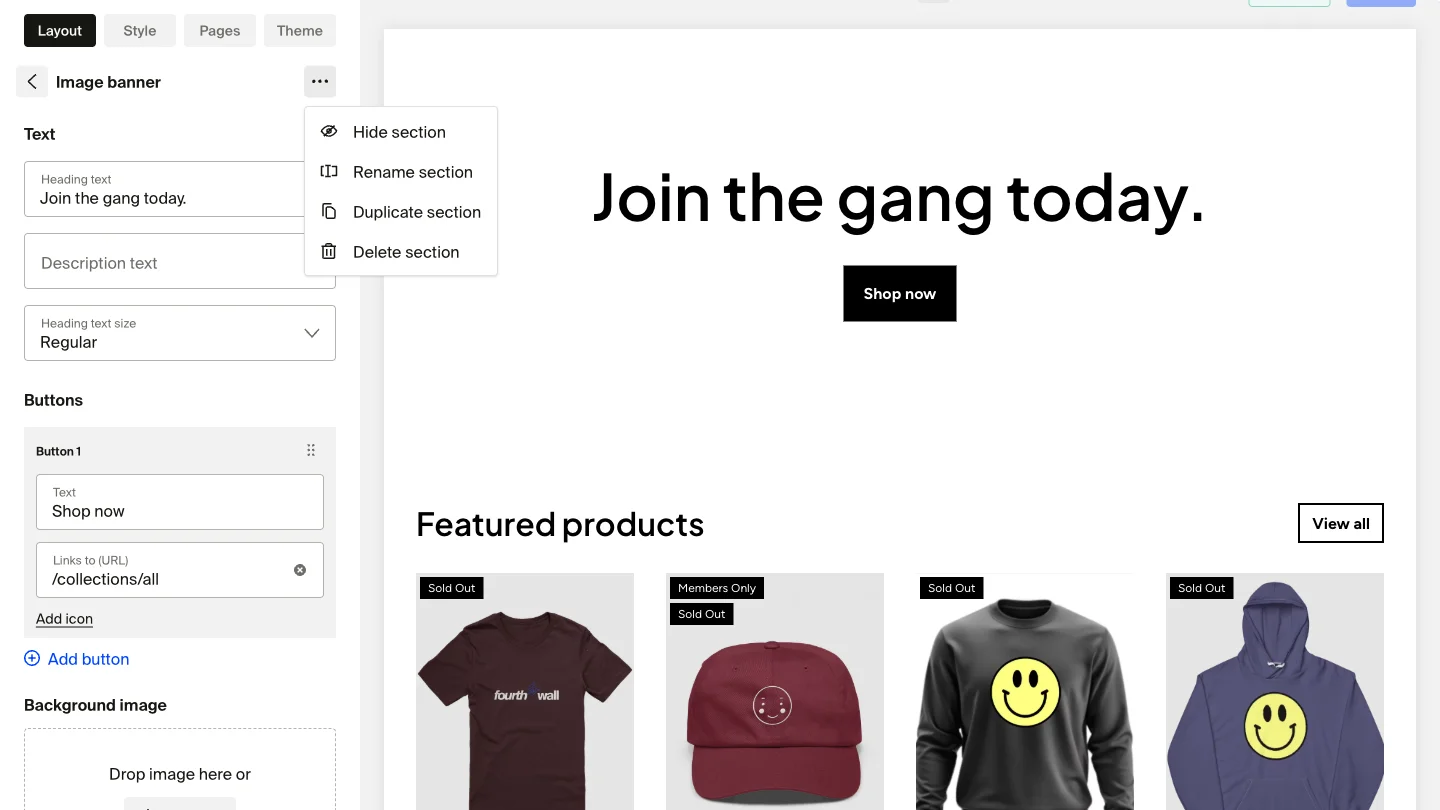
Step 4: Edit a section's settings
Click any section in the left panel to open its settings. Each section has its own set of options. Common settings include:
- Alignment: controls how text and elements are positioned.
- Background color: sets a custom background for the section.
- Links and buttons: configures where the section's call-to-action points.
Make your changes in the settings panel. The preview updates live. Click Save when you're done.
Show advanced options
Less common settings sit behind the Advanced toggle at the bottom of the panel. This keeps the panel short for everyday edits and surfaces power-user controls only when you need them.
Click Advanced to reveal options like:
- Customize colors: override the section's colors independently of your theme.
- Adjust text size: change font sizes for that section.
- Padding: adjust the space above and below the section content.
- Add custom CSS code: apply your own CSS to fine-tune the section.
Settings that appear when you need them
Some settings only show up after you turn on a related option. This keeps the panel focused on what's relevant to your current setup.
For example, in the Announcement bar section, the Countdown start date and Countdown end date fields appear only after you check Enable countdown. Until then, those date fields stay hidden so the panel isn't cluttered with inputs you don't need.
Edit blocks inside a section
Some sections, like Hero/banner or Featured collection, contain individual blocks (a heading, a button, an image). To edit a block, open the section and click the block in the Blocks list. The panel switches to a dedicated sub-view for that block.
Each block has its own settings page. Use the back arrow at the top of the panel to return to the parent section. This keeps the section view short and makes it easier to find the block you want to edit.
Step 5: Duplicate, hide, or delete a section
Click the three-dot menu icon next to any section to see these options:
- Duplicate — creates a copy of the section directly below it, with all settings preserved
- Hide — toggles the section's visibility for site visitors without removing it from the page
- Delete — permanently removes the section from the page
Using section visibility
The eye icon on each section also controls visibility directly. Click it to hide or show the section. Hidden sections appear grayed out in the editor but are not visible to visitors.
This is useful for seasonal content. For example, you can build a holiday promotion section, hide it until it goes live, and re-hide it once the promotion ends, without deleting anything.
Hiding a section saves it on the page. All settings and content are preserved. You can make it visible again at any time.
Frequently asked questions
Can I add sections to pages other than the homepage?
Yes. Use the page dropdown at the top of the Layout tab to switch to any page on your site, including custom pages, collection pages, and membership pages. The (+) Add page section button works the same way on every page.
Can I have the same section type appear more than once?
Yes. You can add multiple instances of the same section type on a single page. For example, you can add two Featured collection sections to highlight different collections.
What happens to a section if I hide it?
The section stays on the page with all its content and settings intact. Visitors don't see it, but you can make it visible again at any time by clicking the eye icon.
Can I copy a section to a different page?
No. Duplicate creates a copy on the same page only. To recreate a section on a different page, navigate to that page using the dropdown at the top of the Layout tab, click (+) Add page section, add the same section type, and configure its settings manually.
Can I reorder sections on mobile?
The Layout tab is designed for use in the desktop dashboard. Drag-and-drop reordering works best on a desktop or laptop.